How hard can it be to staple some fabric to a piece of wood? That's the question most people ask before their first dining chair reupholstering project, and the straightforward answer is: not very. But that answer hides the three variables that determine whether your Saturday produces a chair you're proud of or a lumpy mess nobody wants to sit on.
The skill that separates a good result from a wasted afternoon isn't sewing. It's knowing when to walk away from a chair with a cracked seat base.
Fabric weight, foam density, and staple technique interact in ways you won't notice until you've done it wrong once. A thrifted chair with a solid frame and an intact wooden seat base can be transformed in under an hour with about thirty dollars in materials. That's the promise. Whether it delivers depends on what you brought home.
Assess What You Brought Home
Before you buy fabric, before you touch a staple gun, flip the chair over. Unscrew the seat from the frame. Four screws, usually. A Phillips head handles most of them.
What you're looking at determines whether this project is worth starting. A solid plywood seat base with no cracks or water damage means go. Particle board that crumbles when you poke it means the chair goes back. Amanda Brown, author of Spruce: A Step-by-Step Guide to Upholstery and Design, recommends checking the bones of any chair before committing: carved wood and solid construction are good signs, but be leery of wobbly frames since repairs get expensive fast.[1]
Check the frame joints too. Grab the chair by the back and give it a firm wiggle. Movement at the joints is fixable with wood glue and a clamp. A split rail or a cracked leg is not, not for a beginner. The foam on thrifted chairs is almost always shot. That's fine. You're replacing it anyway. But the wooden seat base is the one part you can't easily replace without a jigsaw and some woodworking confidence.
Tools You Actually Need
Most upholstery supply lists read like they were written by somebody selling upholstery supplies. You don't need an air compressor. You don't need an electric staple gun. A manual heavy-duty staple gun with 3/8-inch staples handles dining chair seats without trouble. The Arrow T50 is the workhorse here, but any heavy-duty manual stapler from a hardware store does the job.
The chair seat is a canvas stretched over wood. Tension, not glue, holds the result together. And tension comes from staples placed in the right sequence, not from specialized equipment.
Here's what you actually need: staple gun, flathead screwdriver for prying old staples, sharp scissors, and needle-nose pliers for staples that snap instead of pulling out. That's four items. Add a serrated bread knife if you're cutting foam. It works better than scissors on anything thicker than an inch. Optional: spray adhesive for attaching foam, and a yardstick.
Skip list for your first project:
- Electric or pneumatic staple gun. Manual works fine on plywood seat bases.
- Upholstery tack strip or webbing. Not needed for drop-in seats.
- Welting cord or piping foot. Decorative. Adds complexity you don't need.
- Specialty staple remover. A screwdriver and pliers outperform most of them.
Fabric and Foam: The Two Decisions That Determine Everything
Fabric choice matters more than technique. A beginner with great fabric gets a better result than an expert with the wrong material. For dining chairs, you want upholstery-weight fabric, not quilting cotton, not apparel fabric. Upholstery fabric has the density to survive daily sitting without tearing at the staple line.
Cotton duck canvas is the easiest fabric for a beginner to work with. It holds tension well, doesn't slip during stapling, and costs around eight to fifteen dollars a yard at any Joann or online fabric retailer.[2] Polyester-cotton blends add stain resistance without the slipperiness of pure synthetics. Avoid stretchy fabrics entirely. If you can pull a corner and it stretches more than an eighth of an inch, it will fight you during stapling and sag within months.
| Fabric Type | Durability | Stain Handling | Beginner Ease | Approx. Cost/Yard |
|---|---|---|---|---|
| Cotton duck canvas | Good | Needs treatment | Best | $8-15 |
| Polyester blend (50/50+) | Very good | Good | Excellent | $10-20 |
| Microfiber | Excellent | Excellent | Good | $12-25 |
| Velvet | Good | Fair | Difficult | $15-35 |
| Linen | Poor | Poor | Fair | $15-30 |
For a first project, cotton duck canvas or a poly-cotton blend is the sweet spot. Both are forgiving and cheap enough that a mistake doesn't hurt.
Foam is simpler. High-density foam, 1 to 2 inches thick, firm rather than soft. FoamOnline and other suppliers call this "luxury firm" or "high resilience."[3] One inch gives a tailored, streamlined look. Two inches gives more cushion. Either works for dining chairs. Avoid memory foam. It bottoms out under body weight and the slow recovery feels unstable when you're eating.
One yard of 54-inch-wide upholstery fabric covers two standard dining chair seats. Measure your seat base before buying. Add 4 inches on every side for wrapping around to the underside, more if your foam is thicker than 2 inches.[1]
The Process, Step by Step
The technique that makes reupholstering work is simple: staple from the center of each side outward, pulling fabric taut as you go. That's the mechanism. Everything else is preparation.
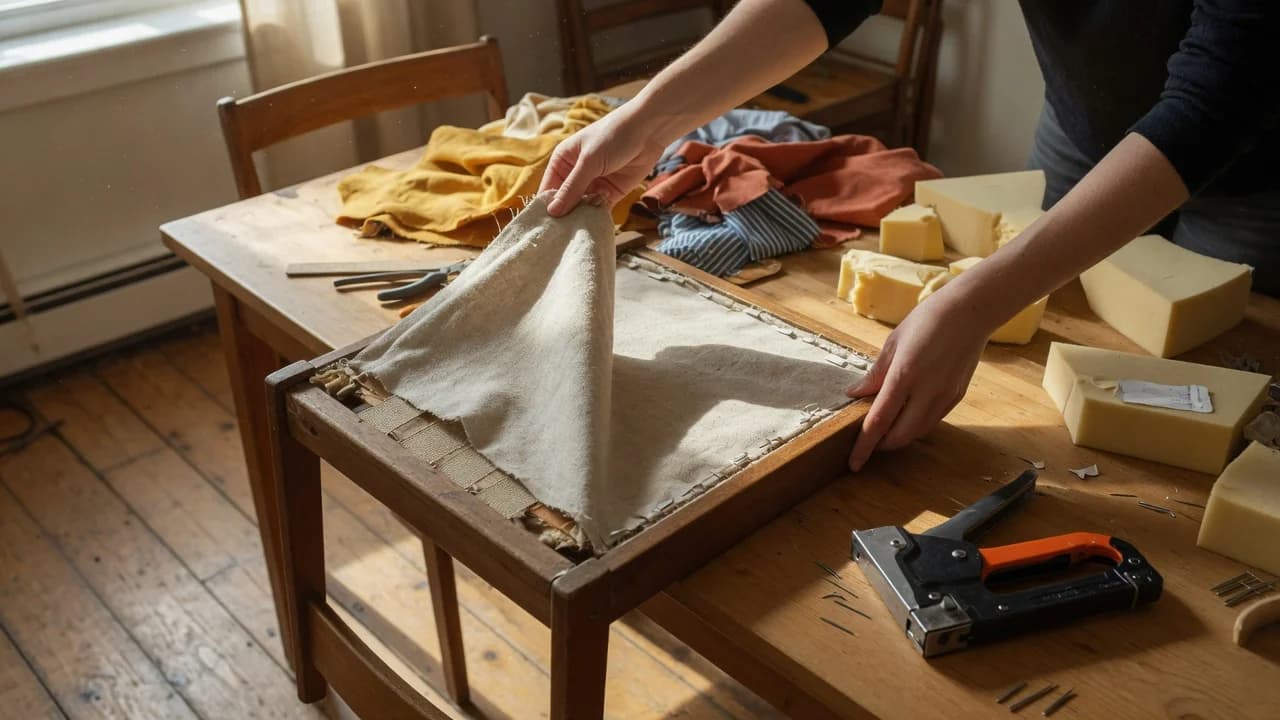
Remove the old fabric by prying up staples with your screwdriver. Don't bother removing every staple from the underside. Just the ones holding fabric. Old staples buried in the wood won't interfere with new ones.
If the old foam is crumbling or flattened (it will be), peel it off. Trace the seat base onto your new foam with a marker, cut with a serrated knife, and attach with spray adhesive. Let it set a few minutes before adding fabric.[1] A layer of polyester batting between foam and fabric is optional but masks any unevenness in the foam cut.
Lay your fabric face-down on a clean surface. Center the seat base foam-side down on top of it. Pull one edge of fabric over the seat base and place a single staple in the center of that edge. Move to the opposite edge, pull the fabric taut (not distorted, just taut), and staple once in the center. Do the same for the remaining two sides. You now have four center staples anchoring the fabric.
Now work outward from each center staple, placing staples every half-inch to three-quarters of an inch. Pull and smooth as you go. The fabric should look even across the top with no ripples. Leave the corners for last.
Or rather: most beginners staple the corners too early and create puckers they can't undo. Finish all four straight edges first, then fold each corner hospital-corner style, like wrapping a gift, and staple the fold flat. Trim excess fabric close to the staple line.
This is where the downside of rushing shows up. If you're 45 minutes in and frustrated, walk away. Fabric tension is easier to get right with fresh hands. A chair half-done can sit overnight. A chair done badly stays bad.
Finishing and Reassembly
The underside of your seat will look messy. That's normal. If you want a clean finish, cut a piece of black cambric dust cover fabric slightly smaller than the seat base and staple it over the raw edges.[1] This step is cosmetic but takes five minutes and makes the chair look professionally done.
Screw the seat back onto the frame. Don't overtighten. The screws should be snug, not buried. Overtightening can strip old wood or crack a vintage seat base. Sit on the chair. If you feel a staple through the fabric, the material is too thin or you skipped the batting. If the seat rocks, a screw is loose or the frame joint needs attention.
Not every thrifted chair is worth reupholstering. If the frame is rickety after reassembly, if the finish is chipped beyond what you're willing to refinish, if the chair simply isn't comfortable even with new foam, you've learned a skill on a chair that cost five dollars. That's not a failure. That's tuition. The next chair will be faster.
Do the first chair all the way through before buying fabric for the rest of the set. One chair teaches you fabric behavior, staple spacing, and corner folding in a way no guide can. If it takes 45 minutes and looks good, buy yardage for the remaining chairs. If it takes two hours and looks rough, you've wasted a half-yard of fabric and you know exactly what to fix. Either way, you're one chair ahead of where you started.